Following on from our article about 80/20 (aka ‘polarised’) training, this next instalment of Coaches Corner focusses on training zones.
Running at different training intensities causes the body to respond in different ways. For example, you use different muscle fibres, fuel sources, and work your heart to differing extents.
Training zones are a useful way to talk about different training intensities and the broad benefits these different zones provide.
We have summarised the key training zones below.
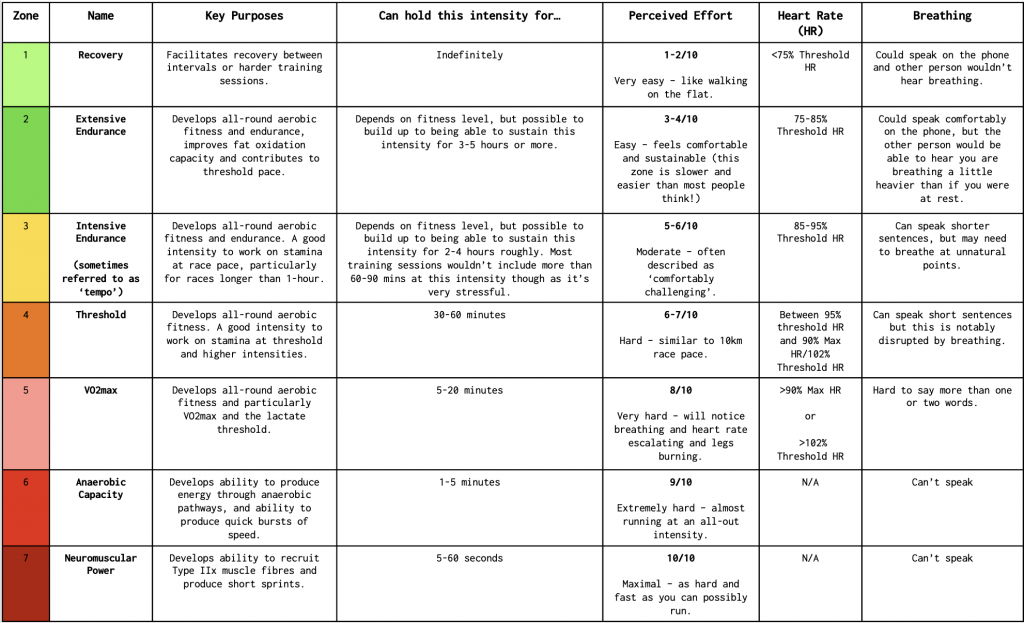
Linking back to the 80/20 training approach, the green zones are considered low-intensity.
Zone 2 in particular is the effort level you’ll want to target for the majority of your training runs, as this is optimal for developing a wide range of aerobic abilities, including your all-important fat oxidation ability.
The yellow/orange zones are considered medium intensity. These intensities should be used quite sparingly in general, and ideally with a specific purpose (e.g. to improve endurance at race-pace).
The pink/red zones are considered high-intensity. This is the effort level you’ll want to run at during your high-intensity sessions (which should make up between 1-2 of your weekly training sessions).
While I’ve included a range of metrics to help you gauge intensity level (such as heart rate, pace and perceived effort), one of the best and most accurate markers to pay attention to is your breathing rate. Try to keep this in mind when you’re running to help you stay in the right zone!
If you’d like to learn about training zones in more detail, check out this article.
Written by Dr Emma Wilkins (physiology consultant and coach at High North Running)